Lesson 24

Lesson Objective: In this lesson, we will learn about the Fill Tool.
FILL TOOL USAGE
The fill tool creates a 2D quilt based on a sketch. Fill surfaces are often used to help create surface models.
CREATING A FILL
The Fill tool is the following icon on the Feature Toolbar.
![]()
To demonstrate this feature, we will create a brand new part called Fill_Surface from the Startpart_English template. Make sure your default datum planes are visible, and then click on the Fill tool icon in the Feature Toolbar. The following dashboard appears.
![]()
The only thing we have to do for this feature is define a sketch, either by selecting an existing sketch feature, or by sketching on-the-fly. We will use the right mouse button and select Define Internal Sketch, to sketch on-the-fly.
For a sketching plane, use the TOP datum plane, and face the RIGHT datum plane towards the Right. Our sketch will look like the following.
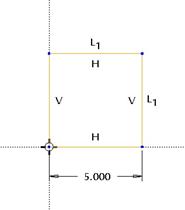
When we click on the blue check mark to complete our sketch, we will see the preview of the surface in yellow.
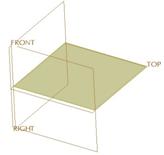
Click on the green check mark to complete the fill surface, which now looks like the following.
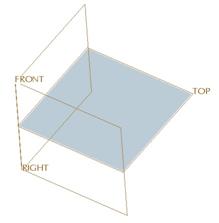
That is all there is to creating a fill feature.
LESSON SUMMARY
The Fill tool is very easy to use, and replaces the flat surface in 2001. Simply define your sketch and finish the feature.
EXERCISES
None